

ansible学习笔记之2 ad-hoc篇
ansible 学习笔记 ad-hoc
使用ansible ad-hoc搭建lnmp/lamp
首先规划下主机,须准备5台服务器(均为centos7):
ansible: 192.168.253.157 ansiable  #IP地址 主机名  提供ansible管理
lamp服务器 :
    lamp1 192.168.253.153   lamp1  #搭建lamp
    lamp2 192.168.253.162   lamp2
lnmp服务器:
    lnmp1:192.168.253.161   #搭建lnmp
    lnmp2:192.168.253.163
编辑host文件,通过秘钥认证ssh连接主机
在ansible管理节点执行如下命令:
[root@ansiable ~]# ssh-copy-id -i /root/.ssh/id_rsa.pub 192.168.253.153
[root@ansiable ~]# ssh-copy-id -i /root/.ssh/id_rsa.pub 192.168.253.162
[root@ansiable ~]# ssh-copy-id -i /root/.ssh/id_rsa.pub 192.168.253.163
[root@ansiable ~]# ssh-copy-id -i /root/.ssh/id_rsa.pub 192.168.253.161
编辑用户家目录下的inventory.cfg,输入如下内容:
[root@ansiable ~]# vim inventory.cfg   #为了方便起见采用自定义inventory.cfg 方式编辑主机
[lamp]
192.168.253.153
192.168.253.162
[lnmp]
192.168.253.161
192.168.253.163
[root@ansiable ~]# ansible all -m ping -i inventory.cfg   #-i指定自定义的inventory文件 ansible会从该文件读取主机列表
192.168.253.163 | SUCCESS => {
    "changed": false,
    "ping": "pong"
}
192.168.253.161 | SUCCESS => {
    "changed": false,
    "ping": "pong"
}
192.168.253.153 | SUCCESS => {
    "changed": false,
    "ping": "pong"
}
192.168.253.162 | SUCCESS => {
    "changed": false,
    "ping": "pong"
}
#到此主机连通性测试结束,ansible能正常连接主机
**
前期环境准备
[root@ansiable ~]#  ansible all -m shell -a 'sed -i '/SELINUX/s/enforcing/disabled/' /etc/selinux/config' -i inventory.cfg    #关闭selinux 重启有效
192.168.253.162 | SUCCESS | rc=0 >>


192.168.253.161 | SUCCESS | rc=0 >>


192.168.253.163 | SUCCESS | rc=0 >>


192.168.253.153 | SUCCESS | rc=0 >>
[root@ansiable ~]# ansible all -m shell -a 'setenforce 0' -i inventory.cfg  #临时关闭selinux
192.168.253.163 | SUCCESS | rc=0 >>


192.168.253.161 | SUCCESS | rc=0 >>


192.168.253.153 | SUCCESS | rc=0 >>


192.168.253.162 | SUCCESS | rc=0 >>


[root@ansiable ~]# ansible all -m shell -a 'getenforce' -i inventory.cfg
192.168.253.162 | SUCCESS | rc=0 >>
Permissive

192.168.253.163 | SUCCESS | rc=0 >>
Permissive

192.168.253.161 | SUCCESS | rc=0 >>
Permissive

192.168.253.153 | SUCCESS | rc=0 >>
Permissive
[root@ansiable ~]# ansible all -m service -a 'name=firewalld state=stopped enabled=false' -i inventory.cfg #关闭iptables 并永久生效
192.168.253.162 | SUCCESS => {
    "changed": true,
    "enabled": false,
    "name": "firewalld",
    "state": "stopped"
}
192.168.253.163 | SUCCESS => {
    "changed": true,
    "enabled": false,
    "name": "firewalld",
    "state": "stopped"
}
192.168.253.161 | SUCCESS => {
    "changed": true,
    "enabled": false,
    "name": "firewalld",
    "state": "stopped"
}
192.168.253.153 | SUCCESS => {
    "changed": true,
    "enabled": false,
    "name": "firewalld",
    "state": "stopped"
}
[root@ansiable ~]# ansible all -m yum -a 'name=epel* state=present' -i inventory.cfg
#添加epel源 省略部分输出
192.168.253.153 | SUCCESS => {
    "changed": true,

192.168.253.162 | SUCCESS => {
    "changed": true,

192.168.253.163 | SUCCESS => {
    "changed": true,

192.168.253.161 | SUCCESS => {
    "changed": true,
在lnmp上安装lnmp
[root@ansiable ~]# ansible lnmp -m yum -a 'name=nginx state=present' -i inventory.cfg
#安装nginx
192.168.253.161 | SUCCESS => {
"changed": true,
"msg": "",
"rc": 0,
192.168.253.163 | SUCCESS => {
"changed": true,
"msg": "",
"rc": 0,
[root@ansiable ~]# ansible lnmp -m yum -a 'name=net-tools state=present' -i inventory.cfg
#安装net-tools等等有用
192.168.253.163 | SUCCESS => {
"changed": true,
192.168.253.161 | SUCCESS => {
"changed": true,
[root@ansiable ~]# ansible lnmp -m service -a 'name=nginx state=started enabled=true' -i inventory.cfg
192.168.253.161 | SUCCESS => {
"changed": true,
"enabled": true,
"name": "nginx",
"state": "started"
}
192.168.253.163 | SUCCESS => {
"changed": true,
"enabled": true,
"name": "nginx",
"state": "started"
}
[root@ansiable ~]# ansible lnmp -m shell -a 'netstat -ntpl' -i inventory.cfg
#可见服务已启动 80端口已监听
192.168.253.163 | SUCCESS | rc=0 >>
Active Internet connections (only servers)
Proto Recv-Q Send-Q Local Address Foreign Address State PID/Program name
tcp 0 0 0.0.0.0:80 0.0.0.0:* LISTEN 11839/nginx: master
tcp 0 0 0.0.0.0:22 0.0.0.0:* LISTEN 1336/sshd
tcp 0 0 127.0.0.1:25 0.0.0.0:* LISTEN 2046/master
tcp6 0 0 :::80 :::* LISTEN 11839/nginx: master
tcp6 0 0 :::22 :::* LISTEN 1336/sshd
tcp6 0 0 ::1:25 :::* LISTEN 2046/master
192.168.253.161 | SUCCESS | rc=0 >>
Active Internet connections (only servers)
Proto Recv-Q Send-Q Local Address Foreign Address State PID/Program name
tcp 0 0 0.0.0.0:80 0.0.0.0:* LISTEN 11922/nginx: master
tcp 0 0 0.0.0.0:22 0.0.0.0:* LISTEN 1331/sshd
tcp 0 0 127.0.0.1:25 0.0.0.0:* LISTEN 2448/master
tcp6 0 0 :::80 :::* LISTEN 11922/nginx: master
tcp6 0 0 :::22 :::* LISTEN 1331/sshd
tcp6 0 0 ::1:25 :::* LISTEN 2448/master
[root@ansiable ~]# ansible lnmp -m yum -a 'name=mariadb* state=present' -i inventory.cfg
192.168.253.163 | SUCCESS => {
"changed": true,
192.168.253.161 | SUCCESS => {
"changed": true,
[root@ansiable ~]# ansible lnmp -m copy -a 'src=my.cnf dest=/root/my.cnf owner=root group=root mode=644 backup=yes' -i inventory.cfg #拷贝配置文件
192.168.253.161 | SUCCESS => {
"changed": true,
"checksum": "f952eafb39c56591b14c941ea9795207cdc5f61a",
"dest": "/root/my.cnf",
"gid": 0,
"group": "root",
"md5sum": "7a001c0ad9c9ddc8e6d66948b0a31c7f",
"mode": "0644",
"owner": "root",
"secontext": "system_u:object_r:admin_home_t:s0",
"size": 699,
"src": "/root/.ansible/tmp/ansible-tmp-1479417547.44-54344140274945/source",
"state": "file",
"uid": 0
}
192.168.253.163 | SUCCESS => {
"changed": true,
"checksum": "f952eafb39c56591b14c941ea9795207cdc5f61a",
"dest": "/root/my.cnf",
"gid": 0,
"group": "root",
"md5sum": "7a001c0ad9c9ddc8e6d66948b0a31c7f",
"mode": "0644",
"owner": "root",
"secontext": "system_u:object_r:admin_home_t:s0",
"size": 699,
"src": "/root/.ansible/tmp/ansible-tmp-1479417547.45-78053821654257/source",
"state": "file",
"uid": 0
}
[root@ansiable ~]# ansible lnmp -m shell -a 'cp /root/my.cnf /etc/my.cnf' -i inventory.cfg
#拷贝配置文件至指定目录
192.168.253.163 | SUCCESS | rc=0 >>
192.168.253.161 | SUCCESS | rc=0 >>
[root@ansiable ~]# ansible lnmp -m shell -a 'mkdir -p /mydata/data/mysql' -i inventory.cfg
#建立数据目录
192.168.253.161 | SUCCESS | rc=0 >>
192.168.253.163 | SUCCESS | rc=0 >>
[root@ansiable ~]# ansible lnmp -m shell -a 'chown mysql:mysql /mydata/data/mysql' -i inventory.cfg
192.168.253.163 | SUCCESS | rc=0 >>
192.168.253.161 | SUCCESS | rc=0 >>
[root@ansiable ~]# ansible lnmp -m service -a 'name=mariadb state=started enabled=true' -i inventory.cfg
#启动mariadb进程
192.168.253.161 | SUCCESS => {
"changed": true,
"enabled": true,
"name": "mariadb",
"state": "started"
}
192.168.253.163 | SUCCESS => {
"changed": true,
"enabled": true,
"name": "mariadb",
"state": "started"
}
[root@ansiable ~]# ansible lnmp -m shell -a 'netstat -ntpl' -i inventory.cfg
192.168.253.161 | SUCCESS | rc=0 >>
Active Internet connections (only servers)
Proto Recv-Q Send-Q Local Address Foreign Address State PID/Program name
tcp 0 0 0.0.0.0:3306 0.0.0.0:* LISTEN 13039/mysqld
tcp 0 0 0.0.0.0:80 0.0.0.0:* LISTEN 11922/nginx: master
tcp 0 0 0.0.0.0:22 0.0.0.0:* LISTEN 1331/sshd
tcp6 0 0 :::80 :::* LISTEN 11922/nginx: master
tcp6 0 0 :::22 :::* LISTEN 1331/sshd
192.168.253.163 | SUCCESS | rc=0 >>
Active Internet connections (only servers)
Proto Recv-Q Send-Q Local Address Foreign Address State PID/Program name
tcp 0 0 0.0.0.0:3306 0.0.0.0:* LISTEN 12872/mysqld
tcp 0 0 0.0.0.0:80 0.0.0.0:* LISTEN 11839/nginx: master
tcp 0 0 0.0.0.0:22 0.0.0.0:* LISTEN 1336/sshd
tcp6 0 0 :::80 :::* LISTEN 11839/nginx: master
tcp6 0 0 :::22 :::* LISTEN 1336/sshd [root@ansiable ~]# ansible lnmp -m shell -a 'yum -y install php lighttpd-fastcgi php-cli php-mysql php-gd php-imap php-ldap php-odbc php-pear php-xml php-xmlrpc php-mbstring php-mcrypt php-mssql php-snmp php-soap' -i inventory.cfg
##安装php所需要的组件
192.168.253.163 | SUCCESS | rc=0 >>
已加载插件:fastestmirror
Loading mirror speeds from cached hostfile
* base: mirrors.cn99.com
* epel: mirror.premi.st
* extras: centos.ustc.edu.cn
* updates: mirrors.aliyun.com
正在解决依赖关系
192.168.253.161 | SUCCESS | rc=0 >>
已加载插件:fastestmirror
Loading mirror speeds from cached hostfile
* base: mirrors.cn99.com
* epel: mirror.premi.st
* extras: mirrors.163.com
* updates: mirrors.163.com
完毕!
[root@ansiable ~]# echo $?
0
#成功
[root@ansiable ~]# ansible lnmp -m shell -a 'yum -y install php-tidy php-common php-devel php-fpm php-mysql' -i inventory.cfg
192.168.253.161 | SUCCESS | rc=0 >>
已加载插件:fastestmirror
Loading mirror speeds from cached hostfile
* base: mirrors.cn99.com
* epel: mirror.lzu.edu.cn
* extras: mirrors.163.com
* updates: mirrors.163.com
软件包 php-common-5.4.16-36.3.el7_2.x86_64 已安装并且是最新版本
软件包 php-mysql-5.4.16-36.3.el7_2.x86_64 已安装并且是最新版本
正在解决依赖关系
完毕!
192.168.253.163 | SUCCESS | rc=0 >>
已加载插件:fastestmirror
Loading mirror speeds from cached hostfile
* base: mirrors.cn99.com
* epel: mirror.premi.st
* extras: centos.ustc.edu.cn
* updates: mirrors.aliyun.com
完毕!
[root@ansiable ~]# echo $?
0
[root@ansiable ~]# ansible lnmp -m service -a 'name=php-fpm state=started enabled=true' -i inventory.cfg #启动php-fpm
192.168.253.163 | SUCCESS => {
"changed": true,
"enabled": true,
"name": "php-fpm",
"state": "started"
}
192.168.253.161 | SUCCESS => {
"changed": true,
"enabled": true,
"name": "php-fpm",
"state": "started"
}
[root@ansiable ~]# ansible lnmp -m shell -a 'netstat -ntpl' -i inventory.cfg
#php-fpm已经启动
192.168.253.161 | SUCCESS | rc=0 >>
Active Internet connections (only servers)
Proto Recv-Q Send-Q Local Address Foreign Address State PID/Program name
tcp 0 0 127.0.0.1:9000 0.0.0.0:* LISTEN 13519/php-fpm: mast
tcp 0 0 0.0.0.0:3306 0.0.0.0:* LISTEN 13039/mysqld
tcp 0 0 0.0.0.0:80 0.0.0.0:* LISTEN 11922/nginx: master
tcp 0 0 0.0.0.0:22 0.0.0.0:* LISTEN 1331/sshd
tcp6 0 0 :::80 :::* LISTEN 11922/nginx: master
tcp6 0 0 :::22 :::* LISTEN 1331/sshd
192.168.253.163 | SUCCESS | rc=0 >>
Active Internet connections (only servers)
Proto Recv-Q Send-Q Local Address Foreign Address State PID/Program name
tcp 0 0 127.0.0.1:9000 0.0.0.0:* LISTEN 13324/php-fpm: mast
tcp 0 0 0.0.0.0:3306 0.0.0.0:* LISTEN 12872/mysqld
tcp 0 0 0.0.0.0:80 0.0.0.0:* LISTEN 11839/nginx: master
tcp 0 0 0.0.0.0:22 0.0.0.0:* LISTEN 1336/sshd
tcp6 0 0 :::80 :::* LISTEN 11839/nginx: master
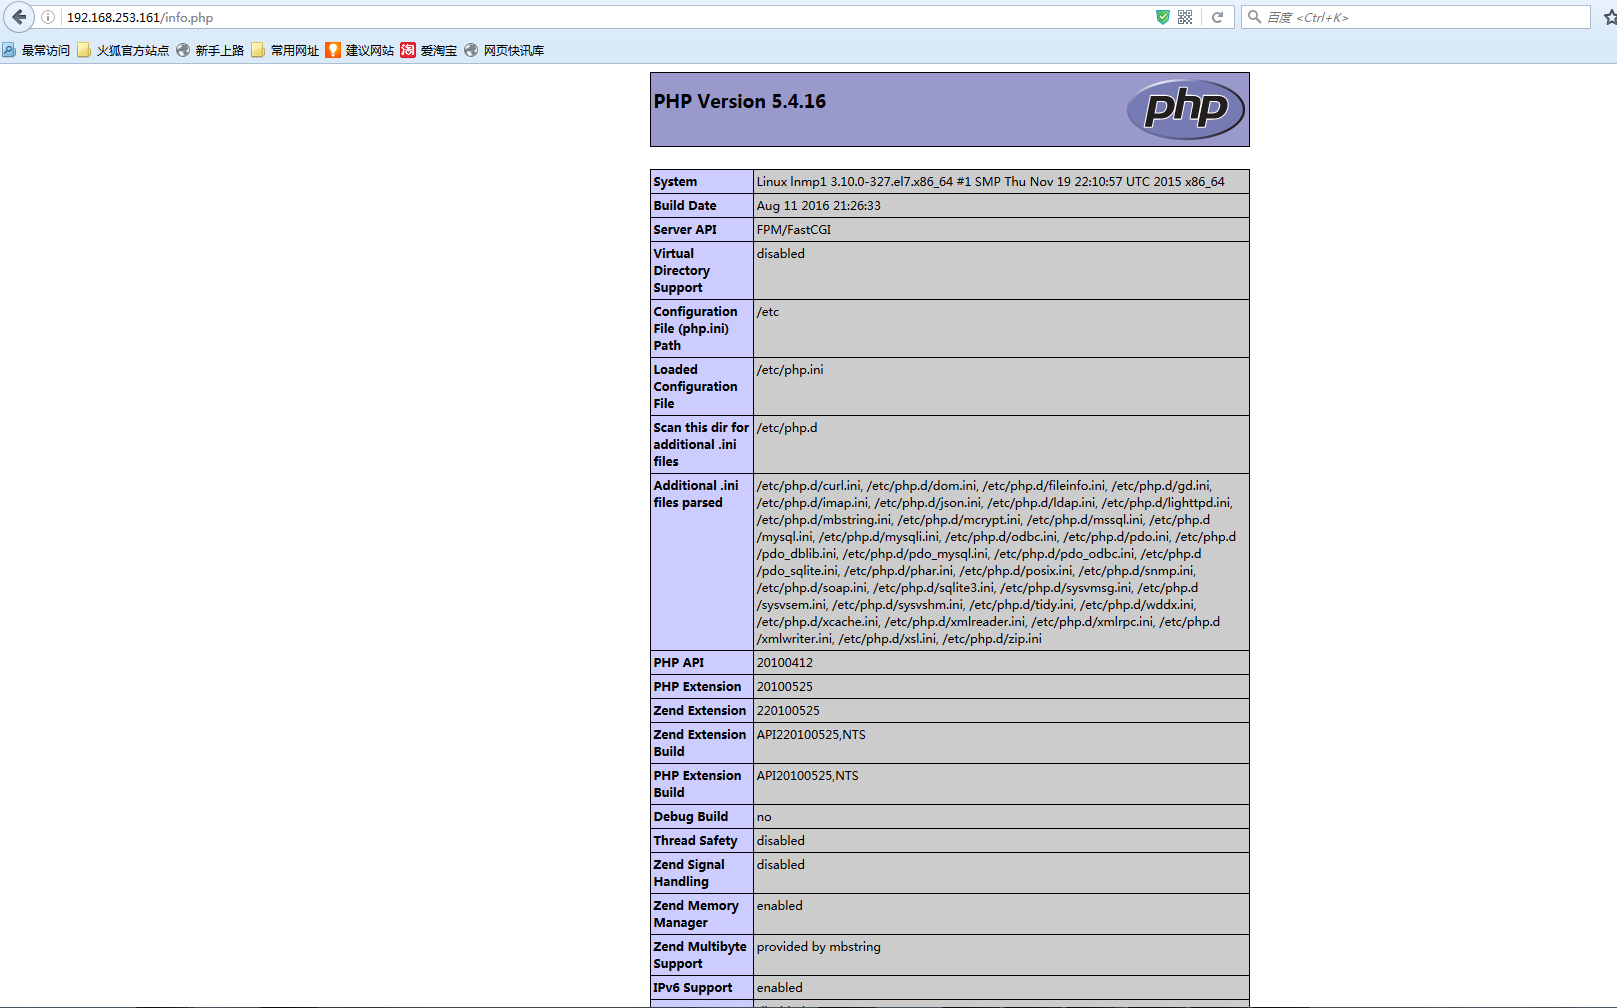
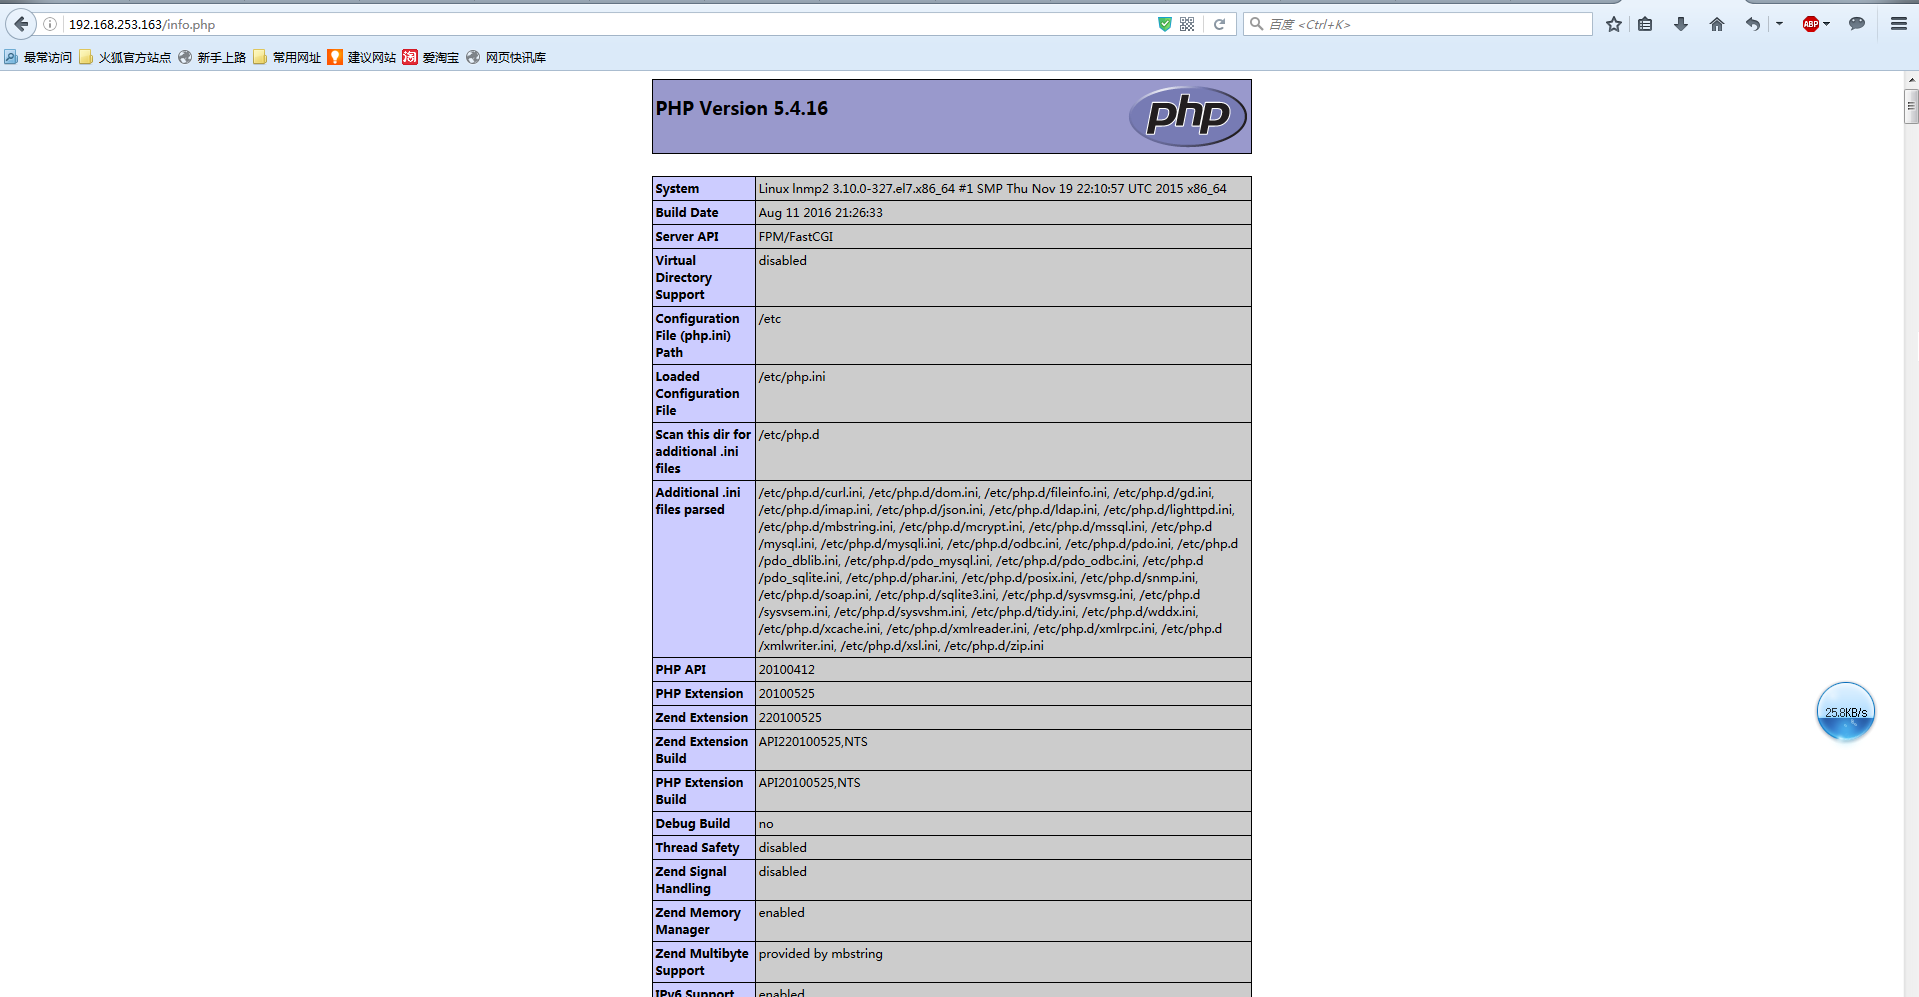
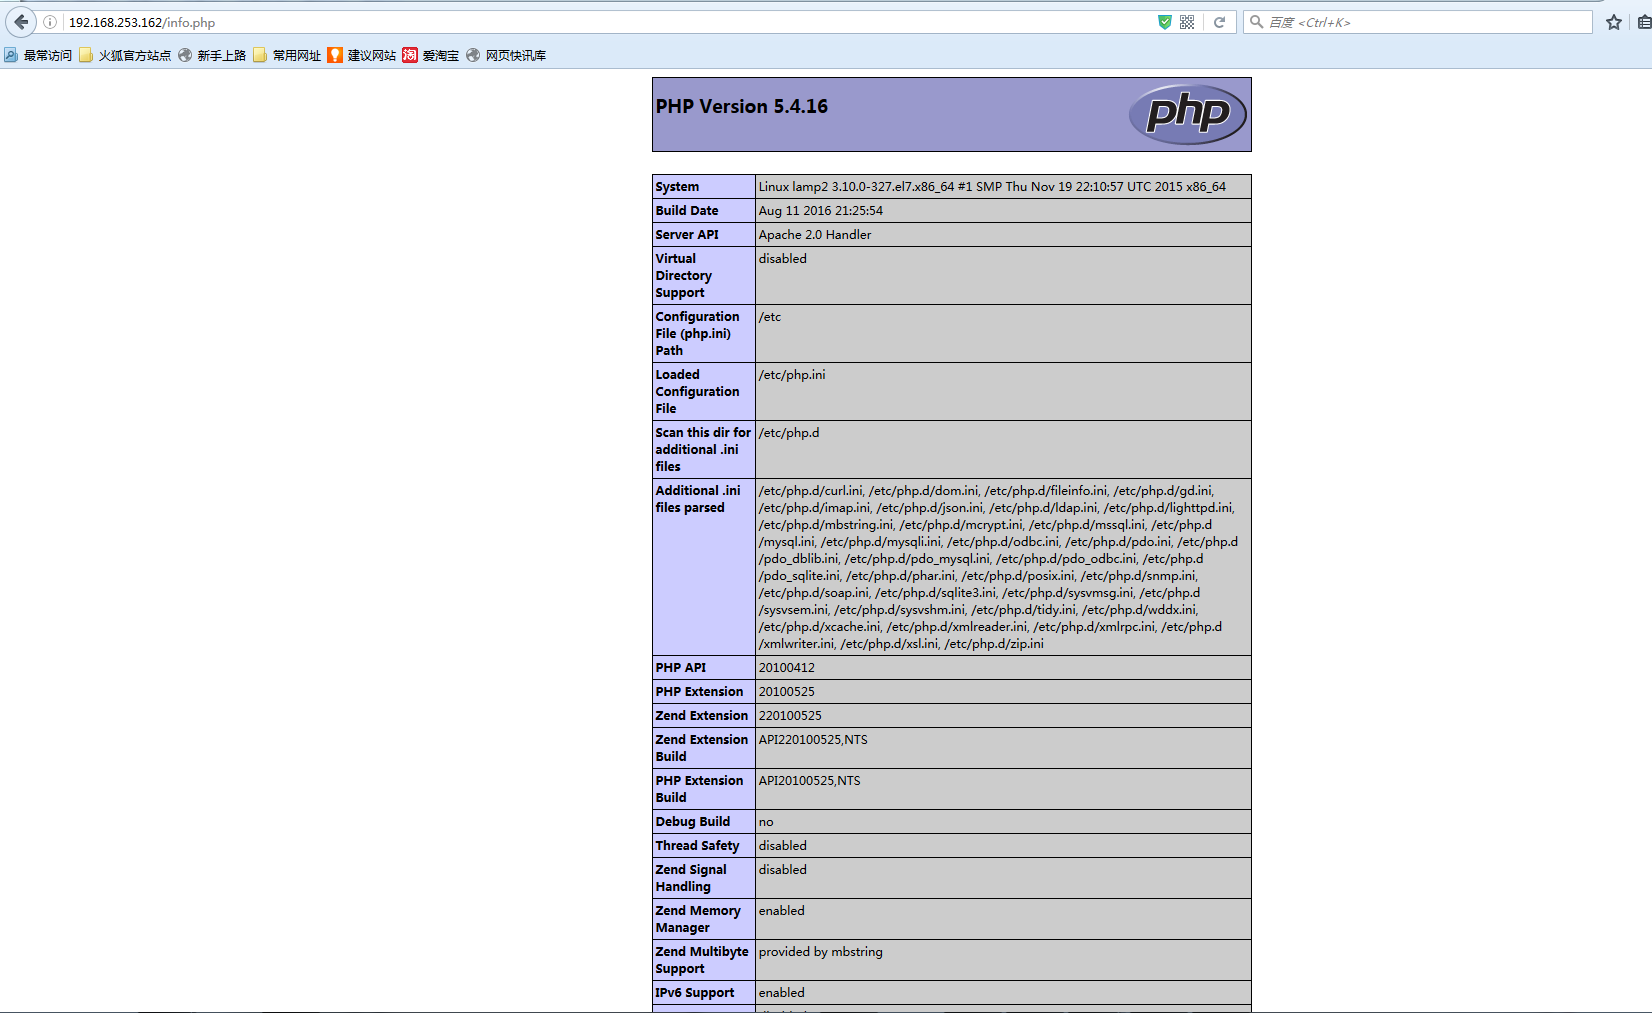
tcp6 0 0 :::22 :::* LISTEN 1336/sshd [root@ansiable ~]# vim /usr/share/nginx/html/info.php
#编辑测试文件添加如下内容:
<?php
phpinfo();
?>
[root@ansiable ~]# ansible lnmp -m copy -a 'src=/root/info.php dest=/usr/share/nginx/html/info.php owner=root group=root mode=644 backup=yes' -i inventory.cfg
#向下分发测试文件
192.168.253.161 | SUCCESS => {
"changed": true,
"checksum": "9e5d7cd2f45cc3a092a0cb3e68184a5826310a28",
"dest": "/usr/share/nginx/html/info.php",
"gid": 0,
"group": "root",
"md5sum": "231dda2188079d6e62e88482373b033f",
"mode": "0644",
"owner": "root",
"secontext": "system_u:object_r:usr_t:s0",
"size": 24,
"src": "/root/.ansible/tmp/ansible-tmp-1479421598.52-80578860901673/source",
"state": "file",
"uid": 0
}
192.168.253.163 | SUCCESS => {
"changed": true,
"checksum": "9e5d7cd2f45cc3a092a0cb3e68184a5826310a28",
"dest": "/usr/share/nginx/html/info.php",
"gid": 0,
"group": "root",
"md5sum": "231dda2188079d6e62e88482373b033f",
"mode": "0644",
"owner": "root",
"secontext": "system_u:object_r:usr_t:s0",
"size": 24,
"src": "/root/.ansible/tmp/ansible-tmp-1479421598.57-44193563671226/source",
"state": "file",
"uid": 0
}
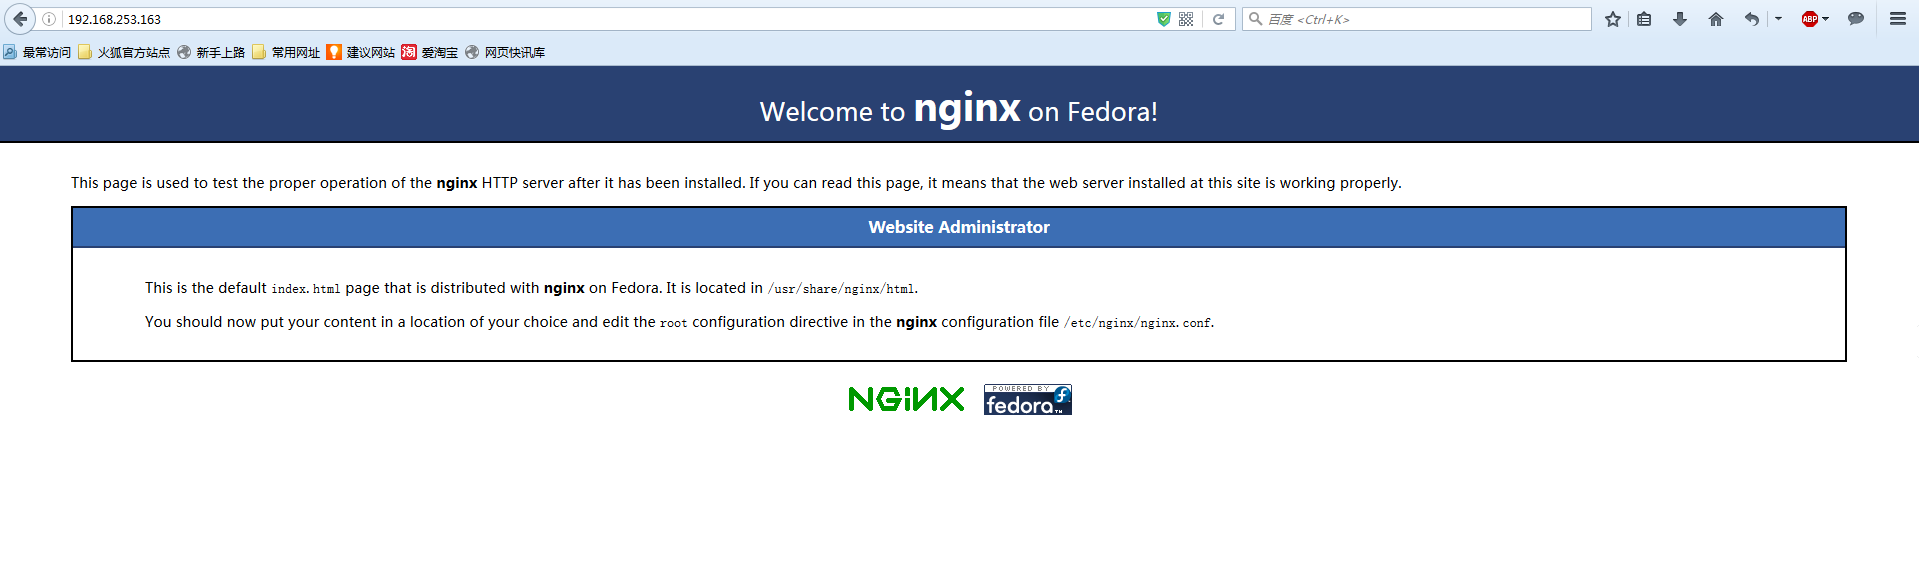
[root@ansiable ~]# cp 192.168.253.161/etc/nginx/nginx.conf.default /root/
#复制该文件至 /root
[root@ansiable ~]# ansible lnmp -m shell -a ' mv /etc/nginx/nginx.conf /etc/nginx/nginx.conf.bak' -i inventory.cfg
#备份原配置文件
192.168.253.161 | SUCCESS | rc=0 >>
192.168.253.163 | SUCCESS | rc=0 >>
[root@ansiable ~]# ansible lnmp -m copy -a 'src=/root/nginx.conf.default dest=/etc/nginx/nginx.conf owner=root group=root mode=644 backup=yes' -i inventory.cfg
#复制配置文件
192.168.253.161 | SUCCESS => {
"changed": true,
"checksum": "d548a69f9775dd7bfe752b7ed9a43b6a2413eda9",
"dest": "/etc/nginx/nginx.conf",
"gid": 0,
"group": "root",
"md5sum": "3a0b1f2d0a5734fe3200a48703bafed2",
"mode": "0644",
"owner": "root",
"secontext": "system_u:object_r:httpd_config_t:s0",
"size": 2656,
"src": "/root/.ansible/tmp/ansible-tmp-1479422681.46-206335273728822/source",
"state": "file",
"uid": 0
}
192.168.253.163 | SUCCESS => {
"changed": true,
"checksum": "d548a69f9775dd7bfe752b7ed9a43b6a2413eda9",
"dest": "/etc/nginx/nginx.conf",
"gid": 0,
"group": "root",
"md5sum": "3a0b1f2d0a5734fe3200a48703bafed2",
"mode": "0644",
"owner": "root",
"secontext": "system_u:object_r:httpd_config_t:s0",
"size": 2656,
"src": "/root/.ansible/tmp/ansible-tmp-1479422681.48-239019232951413/source",
"state": "file",
"uid": 0
}
[root@ansiable ~]# ansible lnmp -m shell -a 'echo "cgi.fix_pathinfo = 1" >> /etc/php.ini' -i inventory.cfg
#在php.ini中加入内容
192.168.253.161 | SUCCESS | rc=0 >>
192.168.253.163 | SUCCESS | rc=0 >>
[root@ansiable ~]# ansible lnmp -m service -a 'name=php-fpm state=started enabled=true' -i inventory.cfg #启动服务 并设置自启动
192.168.253.163 | SUCCESS => {
"changed": false,
"enabled": true,
"name": "php-fpm",
"state": "started"
}
192.168.253.161 | SUCCESS => {
"changed": false,
"enabled": true,
"name": "php-fpm",
"state": "started"
}
[root@ansiable ~]# ansible lnmp -m shell -a 'netstat -ntpl' -i inventory.cfg
#查看服务是否启动
192.168.253.161 | SUCCESS | rc=0 >>
Active Internet connections (only servers)
Proto Recv-Q Send-Q Local Address Foreign Address State PID/Program name
tcp 0 0 127.0.0.1:9000 0.0.0.0:* LISTEN 13519/php-fpm: mast
tcp 0 0 0.0.0.0:3306 0.0.0.0:* LISTEN 13039/mysqld
tcp 0 0 0.0.0.0:80 0.0.0.0:* LISTEN 11922/nginx: master
tcp 0 0 0.0.0.0:22 0.0.0.0:* LISTEN 1331/sshd
tcp6 0 0 :::80 :::* LISTEN 11922/nginx: master
tcp6 0 0 :::22 :::* LISTEN 1331/sshd
192.168.253.163 | SUCCESS | rc=0 >>
Active Internet connections (only servers)
Proto Recv-Q Send-Q Local Address Foreign Address State PID/Program name
tcp 0 0 127.0.0.1:9000 0.0.0.0:* LISTEN 13324/php-fpm: mast
tcp 0 0 0.0.0.0:3306 0.0.0.0:* LISTEN 12872/mysqld
tcp 0 0 0.0.0.0:80 0.0.0.0:* LISTEN 11839/nginx: master
tcp 0 0 0.0.0.0:22 0.0.0.0:* LISTEN 1336/sshd
tcp6 0 0 :::80 :::* LISTEN 11839/nginx: master
tcp6 0 0 :::22 :::* LISTEN 1336/sshd
#可见服务已经启动 至此lnmp服务搭建已经完成

在lamp上安装lamp
[root@ansiable ~]# ansible lamp -m yum -a 'name=httpd state=present' -i inventory.cfg
192.168.253.153 | SUCCESS => {
    "changed": true,
    "msg": "",
    "rc": 0,
192.168.253.162 | SUCCESS => {
    "changed": true,
    "rc": 0,
[root@ansiable ~]# ansible lamp -m yum -a 'name=mariadb* state=present' -i inventory.cfg
192.168.253.162 | SUCCESS => {
    "changed": true,
    "msg": "",
    "rc": 0,
192.168.253.153 | SUCCESS => {
    "changed": true,
    "msg": "",
    "rc": 0,
[root@ansiable ~]# ansible lamp -m shell -a 'yum -y install php lighttpd-fastcgi php-cli php-mysql php-gd php-imap php-ldap php-odbc php-pear php-xml php-xmlrpc php-mbstring php-mcrypt php-mssql php-snmp php-soap ' -i inventory.cfg

192.168.253.153 | SUCCESS | rc=0 >>
192.168.253.162 | SUCCESS | rc=0 >>
[root@ansiable ~]# ansible lamp -m shell -a 'yum -y install php-tidy php-common php-devel php-fpm php-mysql ' -i inventory.cfg
192.168.253.153 | SUCCESS | rc=0 >>
192.168.253.162 | SUCCESS | rc=0 >>
[root@ansiable ~]# ansible lamp -m copy -a 'src=my.cnf dest=/root/my.cnf owner=root group=root mode=644 backup=yes' -i inventory.cfg
192.168.253.153 | SUCCESS => {
    "changed": true,
    "checksum": "117f8759fafc92b9e23ed677679d6bb4209012ad",
    "dest": "/root/my.cnf",
    "gid": 0,
    "group": "root",
    "md5sum": "c5eb42e3f534b59885a9829e4333d905",
    "mode": "0644",
    "owner": "root",
    "secontext": "system_u:object_r:admin_home_t:s0",
    "size": 721,
    "src": "/root/.ansible/tmp/ansible-tmp-1479429254.55-31095432034843/source",
    "state": "file",
    "uid": 0
}
192.168.253.162 | SUCCESS => {
    "changed": true,
    "checksum": "117f8759fafc92b9e23ed677679d6bb4209012ad",
    "dest": "/root/my.cnf",
    "gid": 0,
    "group": "root",
    "md5sum": "c5eb42e3f534b59885a9829e4333d905",
    "mode": "0644",
    "owner": "root",
    "secontext": "system_u:object_r:admin_home_t:s0",
    "size": 721,
    "src": "/root/.ansible/tmp/ansible-tmp-1479429254.53-99182431200892/source",
    "state": "file",
    "uid": 0
}
[root@ansiable ~]# ansible lamp -m shell -a 'cp /root/my.cnf /etc/my.cnf' -i inventory.cfg
192.168.253.153 | SUCCESS | rc=0 >>
192.168.253.162 | SUCCESS | rc=0 >>
[root@ansiable ~]#  ansible lamp -m shell -a 'mkdir -p /mydata/data/mysql' -i inventory.cfg
192.168.253.162 | SUCCESS | rc=0 >>
192.168.253.153 | SUCCESS | rc=0 >>
[root@ansiable ~]# ansible lamp -m shell -a 'chown mysql:mysql /mydata/data/mysql' -i inventory.cfg
192.168.253.153 | SUCCESS | rc=0 >>
192.168.253.162 | SUCCESS | rc=0 >>
[root@ansiable ~]# ansible lamp -m copy -a 'src=my.cnf dest=/root/my.cnf owner=root group=root mode=644 backup=yes' -i inventory.cfg
192.168.253.153 | SUCCESS => {
    "changed": true,
    "checksum": "117f8759fafc92b9e23ed677679d6bb4209012ad",
    "dest": "/root/my.cnf",
    "gid": 0,
    "group": "root",
    "md5sum": "c5eb42e3f534b59885a9829e4333d905",
    "mode": "0644",
    "owner": "root",
    "secontext": "system_u:object_r:admin_home_t:s0",
    "size": 721,
    "src": "/root/.ansible/tmp/ansible-tmp-1479429254.55-31095432034843/source",
    "state": "file",
    "uid": 0
}
192.168.253.162 | SUCCESS => {
    "changed": true,
    "checksum": "117f8759fafc92b9e23ed677679d6bb4209012ad",
    "dest": "/root/my.cnf",
    "gid": 0,
    "group": "root",
    "md5sum": "c5eb42e3f534b59885a9829e4333d905",
    "mode": "0644",
    "owner": "root",
    "secontext": "system_u:object_r:admin_home_t:s0",
    "size": 721,
    "src": "/root/.ansible/tmp/ansible-tmp-1479429254.53-99182431200892/source",
    "state": "file",
    "uid": 0
}


[root@ansiable ~]# ansible lamp -m service -a 'name=httpd state=started enabled=true' -i inventory.cfg
192.168.253.162 | SUCCESS => {
    "changed": true,
    "enabled": true,
    "name": "httpd",
    "state": "started"
}
192.168.253.153 | SUCCESS => {
    "changed": true,
    "enabled": true,
    "name": "httpd",
    "state": "started"
}
[root@ansiable ~]# ansible lamp -m service -a 'name=mariadb state=started enabled=true' -i inventory.cfg
192.168.253.153 | SUCCESS => {
    "changed": true,
    "enabled": true,
    "name": "mariadb",
    "state": "started"
}
192.168.253.162 | SUCCESS => {
    "changed": true,
    "enabled": true,
    "name": "mariadb",
    "state": "started"
}
[root@ansiable ~]# ansible lamp -m service -a 'name=php-fpm state=started enabled=true' -i inventory.cfg
192.168.253.162 | SUCCESS => {
    "changed": true,
    "enabled": true,
    "name": "php-fpm",
    "state": "started"
}
192.168.253.153 | SUCCESS => {
    "changed": true,
    "enabled": true,
    "name": "php-fpm",
    "state": "started"
}
[root@ansiable ~]# ansible lamp -m shell -a 'netstat -ntpl' -i inventory.cfg
192.168.253.162 | SUCCESS | rc=0 >>
Active Internet connections (only servers)
Proto Recv-Q Send-Q Local Address           Foreign Address         State       PID/Program name
tcp        0      0 127.0.0.1:9000          0.0.0.0:*               LISTEN      12408/php-fpm: mast
tcp        0      0 0.0.0.0:3306            0.0.0.0:*               LISTEN      12322/mysqld
tcp        0      0 0.0.0.0:22              0.0.0.0:*               LISTEN      1338/sshd
tcp6       0      0 :::80                   :::*                    LISTEN      11970/httpd
tcp6       0      0 :::22                   :::*                    LISTEN      1338/sshd

192.168.253.153 | SUCCESS | rc=0 >>
Active Internet connections (only servers)
Proto Recv-Q Send-Q Local Address           Foreign Address         State       PID/Program name
tcp        0      0 127.0.0.1:9000          0.0.0.0:*               LISTEN      12420/php-fpm: mast
tcp        0      0 0.0.0.0:3306            0.0.0.0:*               LISTEN      12334/mysqld
tcp        0      0 0.0.0.0:22              0.0.0.0:*               LISTEN      1318/sshd
tcp6       0      0 :::80                   :::*                    LISTEN      11982/httpd
tcp6       0      0 :::22                   :::*                    LISTEN      1318/sshd
#至此搭建完成

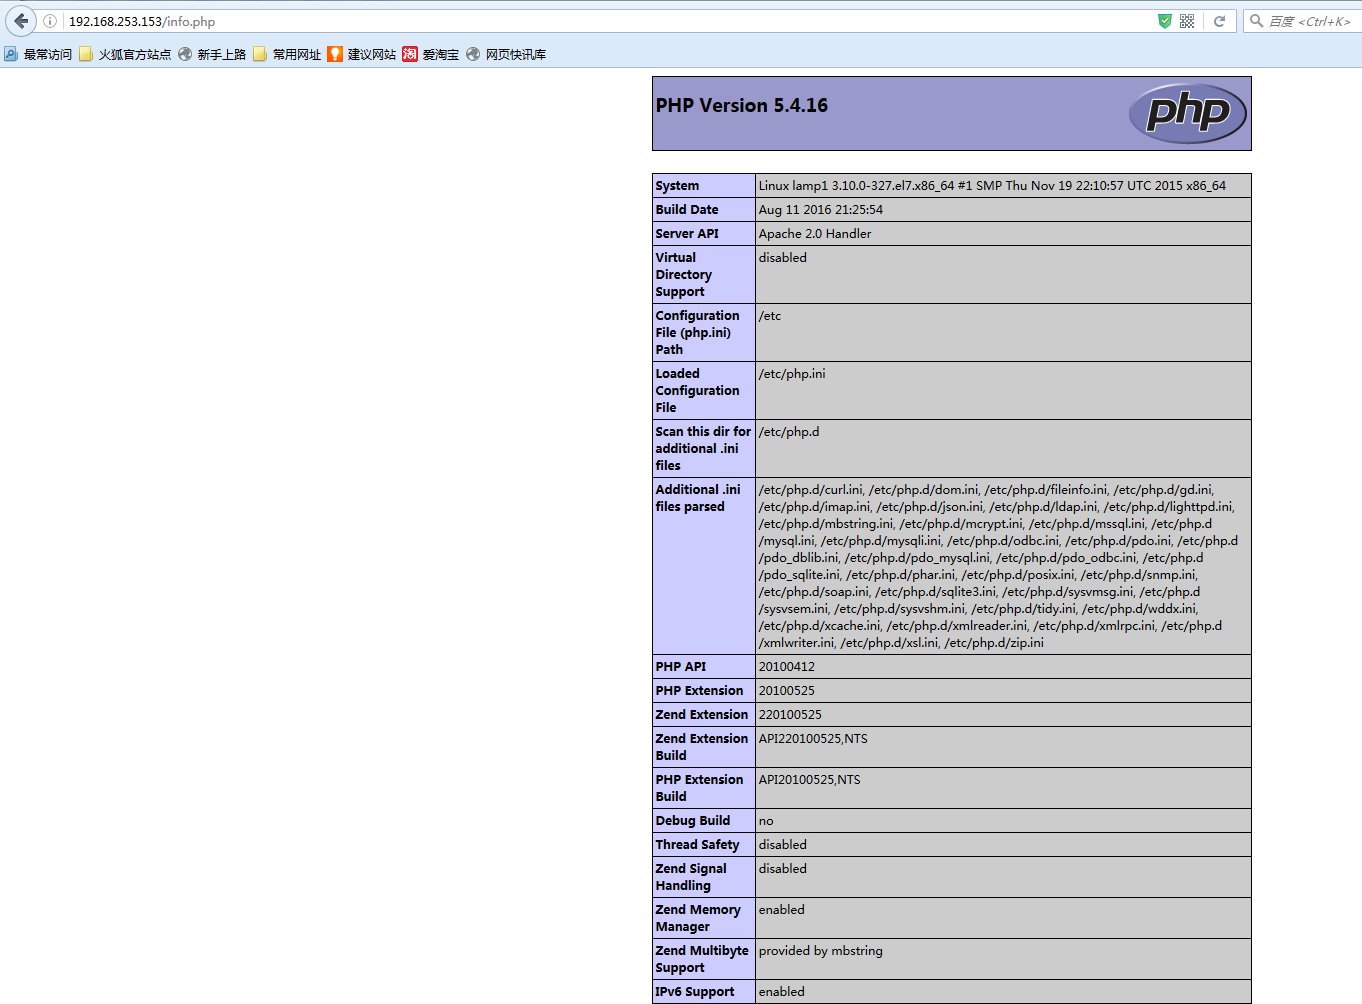
其中
  #vim /info.php
  #添加如下内容:
  <?php
  phpinfo();
  ?>
ad-hoc搭建mysql主从
主机规划:
ansible :192.168.253.157 ansiable
myysql主:
        192.168.253.164 mariadb_master
mysql从:
        192.168.253.166 mariadb_slave1
        192.168.253.165 mariadb_slave2
简介:
搭建一主两从 使用ansible mysql_replication模块搭建管理主从
为了方便起见 mysql采用空密码。
配置文件:
以下是mariadb_master上的配置文件(主):
[mysqld]
datadir=/mydata/data/mysql/
socket=/var/lib/mysql/mysql.sock
symbolic-links=0
innodb_file_per_table = ON
skip_name_resolve = ON
log-bin = binlog
log-bin-index = binlog.index  #开启二进制日志
relay-log=relay-log  #开启中继日志
server_id=1 #设置serverid
[mysqld_safe]
log-error=/var/log/mariadb/mariadb.log
pid-file=/var/run/mariadb/mariadb.pid

!includedir /etc/my.cnf.d

以下是mariadb_slave1上的配置文件(从):
[mysqld]
datadir=/mydata/data/mysql/
socket=/var/lib/mysql/mysql.sock
symbolic-links=0
innodb_file_per_table = ON
skip_name_resolve = ON
log-bin = binlog
log-bin-index = binlog.index  #开启二进制日志
relay-log=relay-log  #开启中继日志
server_id=2 #serverid
read-only = 1               #设置只读
[mysqld_safe]
log-error=/var/log/mariadb/mariadb.log
pid-file=/var/run/mariadb/mariadb.pid

!includedir /etc/my.cnf.d

以下是mariadb_slave2上的配置文件(从):
[mysqld]
datadir=/mydata/data/mysql/
socket=/var/lib/mysql/mysql.sock
symbolic-links=0
innodb_file_per_table = ON
skip_name_resolve = ON
log-bin = binlog
log-bin-index = binlog.index  #开启二进制日志
relay-log=relay-log  #开启中继日志
server_id=3   #serverid
read-only = 1               #设置只读
[mysqld_safe]
log-error=/var/log/mariadb/mariadb.log
pid-file=/var/run/mariadb/mariadb.pid
!includedir /etc/my.cnf.d
现在正式开始:
[root@ansiable ~]# ssh-copy-id root@192.168.253.164

[root@ansiable ~]# ssh-copy-id root@192.168.253.165

[root@ansiable ~]# ssh-copy-id root@192.168.253.166
#以秘钥的方式连接
[root@ansiable ~]# cat inventory.cfg #在资产列表文件中编辑如下内容
[mysql_master]
192.168.253.164
[mysql_slave]
192.168.253.166
192.168.253.165
[mysql_all]
192.168.253.166
192.168.253.165
192.168.253.164

[root@ansiable ~]# ansible mysql_all -m ping -i inventory  #主机连通性测试
 [WARNING]: provided hosts list is empty, only localhost is available

[root@ansiable ~]# ansible mysql_all -m ping -i inventory.cfg
192.168.253.164 | SUCCESS => {
    "changed": false,
    "ping": "pong"
}
192.168.253.166 | SUCCESS => {
    "changed": false,
    "ping": "pong"
}
192.168.253.165 | SUCCESS => {
    "changed": false,
    "ping": "pong"
}
[root@ansiable ~]# ansible mysql_all -m copy -a 'src=/root/my.cnf dest=/etc/my.cnf owner=root group=root mode=644 backup=yes' -i inventory.cfg
#向所有主机提供配置文件
[root@ansiable ~]# ansible mysql_all -m shell -a 'yum install gcc python-devel -y' -i inventory.cfg    #安装模块依赖
[root@ansiable ~]# ansible mysql_all -m shell -a 'yum install epel-release -y' -i inventory.cfg  #安装epel源
[root@ansiable ~]# ansible mysql_all -m shell -a ' yum -y install python-pip -y' -i inventory.cfg #安装pip
[root@ansiable ~]# ansible mysql_all -m service -a 'name=mariadb state=restarted' -i inventory.cfg #确认各节点配置文件正确并重启服务
192.168.253.164 | SUCCESS => {
    "changed": true,
    "name": "mariadb",
    "state": "started"
}
192.168.253.165 | SUCCESS => {
    "changed": true,
    "name": "mariadb",
    "state": "started"
}
192.168.253.166 | SUCCESS => {
    "changed": true,
    "name": "mariadb",
    "state": "started"
}
[root@mariadb_master ~]# mysql  #在master节点创建主从复制账号密码
Welcome to the MariaDB monitor.  Commands end with ; or \g.
Your MariaDB connection id is 48
Server version: 5.5.50-MariaDB MariaDB Server

Copyright (c) 2000, 2016, Oracle, MariaDB Corporation Ab and others.

Type 'help;' or '\h' for help. Type '\c' to clear the current input statement.

MariaDB [(none)]>  GRANT REPLICATION SLAVE, REPLICATION CLIENT ON *.* TO 'rpluser'@'%' IDENTIFIED BY 'rplpasswd';
Query OK, 0 rows affected (0.18 sec)

MariaDB [(none)]> FLUSH PRIVILEGES;
Query OK, 0 rows affected (0.05 sec)

[root@ansiable ~]#  ansible mysql_master -m mysql_replication -a 'login_user=root  mode=getmaster' -i inventory.cfg #获取master信息
192.168.253.164 | SUCCESS => {
    "Binlog_Do_DB": "",
    "Binlog_Ignore_DB": "",
    "File": "binlog.000005",
    "Position": 245,
    "changed": false
}
[root@ansiable ~]# ansible mysql_slave -m mysql_replication -a 'login_user=root  mode=changemaster master_host="192.168.253.164" master_user=rpluser master_password=rplpasswd master_log_file="binlog.000005" master_log_pos=245' -i inventory.cfg
#设置从节点
192.168.253.166 | SUCCESS => {
    "changed": true
}
192.168.253.165 | SUCCESS => {
    "changed": true
}
[root@ansiable ~]# ansible mysql_slave -m mysql_replication -a 'login_user=root  mode=startslave' -i inventory.cfg
192.168.253.166 | SUCCESS => {
    "changed": true,
    "msg": "Slave started "
}
192.168.253.165 | SUCCESS => {
    "changed": true,
    "msg": "Slave started "
}
[root@ansiable ~]#  ansible mysql_slave -m mysql_replication -a 'login_user=root  mode=getslave' -i inventory.cfg
#查看主从情况
192.168.253.165 | SUCCESS => {
    "Connect_Retry": 60,
    "Exec_Master_Log_Pos": 8409,
    "Last_Errno": 0,
    "Last_Error": "",
    "Last_IO_Errno": 0,
    "Last_IO_Error": "",
    "Last_SQL_Errno": 0,
    "Last_SQL_Error": "",
    "Master_Host": "192.168.253.164",
    "Master_Log_File": "binlog.000005",
    "Master_Port": 3306,
    "Master_SSL_Allowed": "No",
    "Master_SSL_CA_File": "",
    "Master_SSL_CA_Path": "",
    "Master_SSL_Cert": "",
    "Master_SSL_Cipher": "",
    "Master_SSL_Key": "",
    "Master_SSL_Verify_Server_Cert": "No",
    "Master_Server_Id": 1,
    "Master_User": "rpluser",
    "Read_Master_Log_Pos": 8409,
    "Relay_Log_File": "relay-log.000002",
    "Relay_Log_Pos": 8690,
    "Relay_Log_Space": 8978,
    "Relay_Master_Log_File": "binlog.000005",
    "Replicate_Do_DB": "",
    "Replicate_Do_Table": "",
    "Replicate_Ignore_DB": "",
    "Replicate_Ignore_Server_Ids": "",
    "Replicate_Ignore_Table": "",
    "Replicate_Wild_Do_Table": "",
    "Replicate_Wild_Ignore_Table": "",
    "Seconds_Behind_Master": 0,
    "Skip_Counter": 0,
    "Slave_IO_Running": "Yes",
    "Slave_IO_State": "Waiting for master to send event",
    "Slave_SQL_Running": "Yes",
    "Until_Condition": "None",
    "Until_Log_File": "",
    "Until_Log_Pos": 0,
    "changed": false
}
192.168.253.166 | SUCCESS => {
    "Connect_Retry": 60,
    "Exec_Master_Log_Pos": 8409,
    "Last_Errno": 0,
    "Last_Error": "",
    "Last_IO_Errno": 0,
    "Last_IO_Error": "",
    "Last_SQL_Errno": 0,
    "Last_SQL_Error": "",
    "Master_Host": "192.168.253.164",
    "Master_Log_File": "binlog.000005",
    "Master_Port": 3306,
    "Master_SSL_Allowed": "No",
    "Master_SSL_CA_File": "",
    "Master_SSL_CA_Path": "",
    "Master_SSL_Cert": "",
    "Master_SSL_Cipher": "",
    "Master_SSL_Key": "",
    "Master_SSL_Verify_Server_Cert": "No",
    "Master_Server_Id": 1,
    "Master_User": "rpluser",
    "Read_Master_Log_Pos": 8409,
    "Relay_Log_File": "relay-log.000002",
    "Relay_Log_Pos": 8690,
    "Relay_Log_Space": 8978,
    "Relay_Master_Log_File": "binlog.000005",
    "Replicate_Do_DB": "",
    "Replicate_Do_Table": "",
    "Replicate_Ignore_DB": "",
    "Replicate_Ignore_Server_Ids": "",
    "Replicate_Ignore_Table": "",
    "Replicate_Wild_Do_Table": "",
    "Replicate_Wild_Ignore_Table": "",
    "Seconds_Behind_Master": 0,
    "Skip_Counter": 0,
    "Slave_IO_Running": "Yes",
    "Slave_IO_State": "Waiting for master to send event",
    "Slave_SQL_Running": "Yes",
    "Until_Condition": "None",
    "Until_Log_File": "",
    "Until_Log_Pos": 0,
    "changed": false
}

#这时主从搭建就完成了
我们来进行测试:
master节点:
[root@mariadb_master ~]# mysql <hellodb.sql
[root@mariadb_master ~]# mysql
Welcome to the MariaDB monitor.  Commands end with ; or \g.
Your MariaDB connection id is 28
Server version: 5.5.50-MariaDB MariaDB Server

Copyright (c) 2000, 2016, Oracle, MariaDB Corporation Ab and others.

Type 'help;' or '\h' for help. Type '\c' to clear the current input statement.

MariaDB [(none)]> SHOW DATABASES ;
+--------------------+
| Database           |
+--------------------+
| information_schema |
| hellodb            |
| mysql              |
| performance_schema |
| test               |
+--------------------+
5 rows in set (0.00 sec)
MariaDB [(none)]> use hellodb
Reading table information for completion of table and column names
You can turn off this feature to get a quicker startup with -A

Database changed
MariaDB [hellodb]> quit ;
Bye
[root@mariadb_master ~]# mysql
Welcome to the MariaDB monitor.  Commands end with ; or \g.
Your MariaDB connection id is 33
Server version: 5.5.50-MariaDB MariaDB Server

Copyright (c) 2000, 2016, Oracle, MariaDB Corporation Ab and others.

Type 'help;' or '\h' for help. Type '\c' to clear the current input statement.

MariaDB [(none)]> CREATE DATABASE replication;
Query OK, 1 row affected (0.00 sec)

MariaDB [(none)]> use replication ;
Database changed
MariaDB [replication]> CREATE TABLE t1(id int unsigned auto_increment primary key, name char(30));
Query OK, 0 rows affected (0.11 sec)

MariaDB [replication]> DESC t1;
+-------+------------------+------+-----+---------+----------------+
| Field | Type             | Null | Key | Default | Extra          |
+-------+------------------+------+-----+---------+----------------+
| id    | int(10) unsigned | NO   | PRI | NULL    | auto_increment |
| name  | char(30)         | YES  |     | NULL    |                |
+-------+------------------+------+-----+---------+----------------+
2 rows in set (0.10 sec)

MariaDB [replication]> SHOW MASTER STATUS;
+---------------+----------+--------------+------------------+
| File          | Position | Binlog_Do_DB | Binlog_Ignore_DB |
+---------------+----------+--------------+------------------+
| binlog.000005 |     8166 |              |                  |
+---------------+----------+--------------+------------------+
1 row in set (0.00 sec)
从节点:
[root@mariadb_slave1 ~]# mysql
Welcome to the MariaDB monitor.  Commands end with ; or \g.
Your MariaDB connection id is 7
Server version: 5.5.50-MariaDB MariaDB Server

Copyright (c) 2000, 2016, Oracle, MariaDB Corporation Ab and others.

Type 'help;' or '\h' for help. Type '\c' to clear the current input statement.

MariaDB [(none)]>  SHOW DATABASE ;
ERROR 1064 (42000): You have an error in your SQL syntax; check the manual that corresponds to your MariaDB server version for the right syntax to use near 'DATABASE' at line 1
MariaDB [(none)]>  SHOW DATABASES ;
+--------------------+
| Database           |
+--------------------+
| information_schema |
| mysql              |
| performance_schema |
| test               |
+--------------------+
4 rows in set (0.37 sec)

MariaDB [(none)]>  SHOW DATABASES ;
+--------------------+
| Database           |
+--------------------+
| information_schema |
| hellodb            |
| mysql              |
| performance_schema |
| replication        |
| test               |
+--------------------+
6 rows in set (0.00 sec)

MariaDB [(none)]> use replication
Reading table information for completion of table and column names
You can turn off this feature to get a quicker startup with -A

Database changed
MariaDB [replication]> DESC t1 ;
+-------+------------------+------+-----+---------+----------------+
| Field | Type             | Null | Key | Default | Extra          |
+-------+------------------+------+-----+---------+----------------+
| id    | int(10) unsigned | NO   | PRI | NULL    | auto_increment |
| name  | char(30)         | YES  |     | NULL    |                |
+-------+------------------+------+-----+---------+----------------+
2 rows in set (0.09 sec)
#主节点的操作已然同步到从节点并执行 slave2节点的测试过程省略
mysql_replication模块各项参数解释:
[root@ansiable ~]# ansible-doc -s mysql_replication  #通过ansible-doc查看模块帮助文档
- name: Manage MySQL replication
  action: mysql_replication
      config_file            # Specify a config file from which user and password are to be read #指明存放保存着主从同步的用户和密码的配置文件以便于读取
      connect_timeout        # The connection timeout when connecting to the MySQL server.
设定连接超时时常
      login_host             # Host running the database   运行着主库的地址(存疑)
      login_password         # The password used to authenticate with
指定登录用户的密码
      login_port             # Port of the MySQL server. Requires login_host be defined as other then localhost if login_port is used 指定登录的端口
      login_unix_socket      # The path to a Unix domain socket for local connections
指定登录的套接字
      login_user             # The username used to authenticate with  指定登录mysql用户
      master_auto_position   # does the host uses GTID based replication or not
设定是否基于GTID进行复制
      master_connect_retry   # same as mysql variable
      master_host            # same as mysql variable  主库的地址
      master_log_file        # same as mysql variable  主库二进制日志位置
      master_log_pos         # same as mysql variable  主节点二进制日志pos 位置
      master_password        # same as mysql variable  主从同步账号的密码
      master_port            # same as mysql variable 主节点的端口
      master_ssl             # same as mysql variable
      master_ssl_ca          # same as mysql variable
      master_ssl_capath      # same as mysql variable
      master_ssl_cert        # same as mysql variable
      master_ssl_cipher      # same as mysql variable
      master_ssl_key         # same as mysql variable
      master_user            # same as mysql variable  #登录的主从同步用户名
mode # module operating mode. Could be getslave (SHOW SLAVE STATUS), getmaster (SHOW MASTER STATUS), changemaster(CHANGE MASTER TO), startslave (START SLAVE), stopslave (STOP SLAVE),
resetslave (RESET SLAVE), resetslaveall (RESET SLAVE ALL)这里面的mode的值其中(等号右边均为mysql命令):
getslave=SHOW SLAVE STATUS
getmaster =SHOW MASTER STATUS
changemaster=CHANGE MASTER TO
startslave =START SLAVE
stopslave=STOP SLAVE
resetslave=RESET SLAVE
resetslaveall=RESET SLAVE ALL
  relay_log_file         # same as mysql variable  指定中继日志位置
  relay_log_pos          # same as mysql variable  指定中继日志pos
  ssl_ca                 # The path to a Certificate Authority (CA) certificate. This option, if used, must specify the same certificate as used by the server.
  ssl_cert               # The path to a client public key certificate.
  ssl_key                # The path to the client private key.
总结
虽然ansible的ad-hoc模式下也很强大但是在此模式下我们还是没法获得更高程度的自动化,这时我们就需要playbook了
原创文章,作者:Net17_desperado,如若转载,请注明出处:http://www.178linux.com/60089

